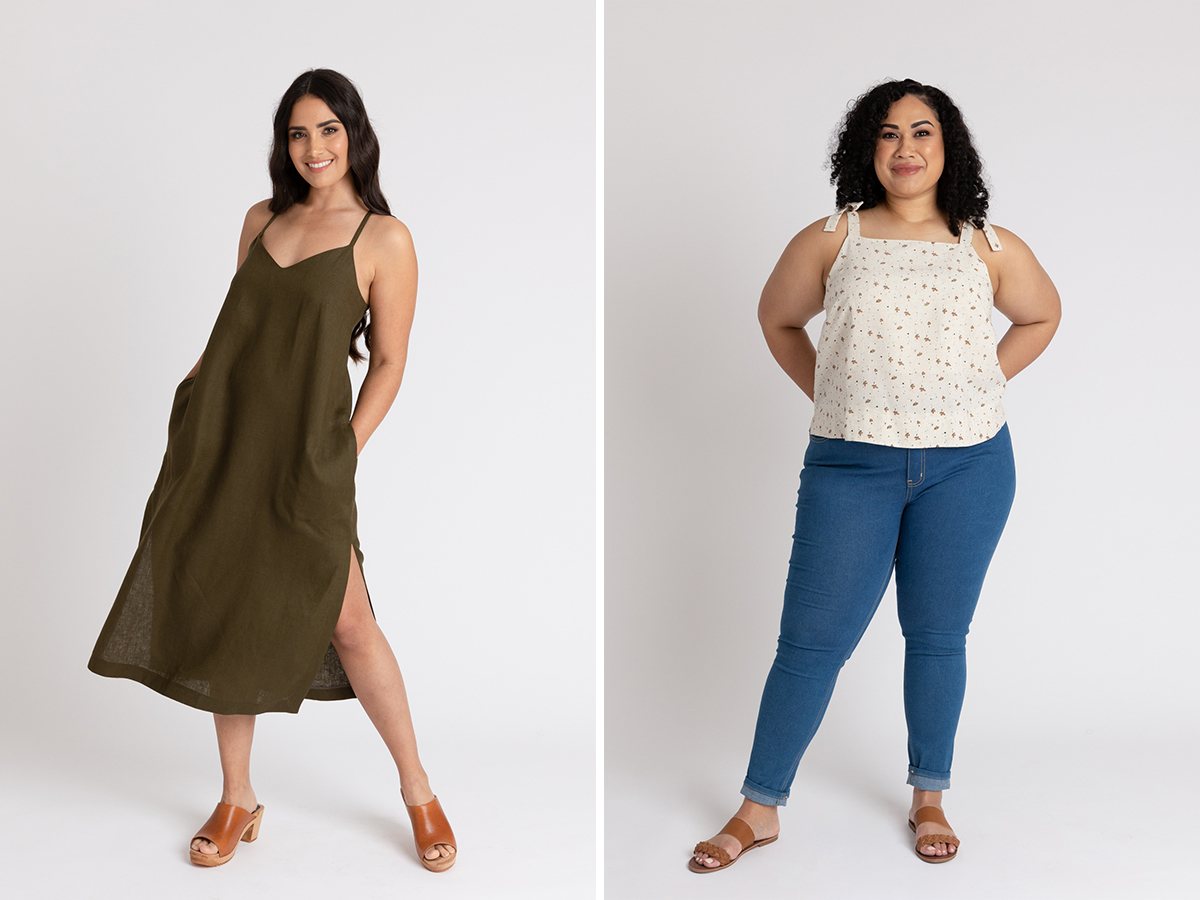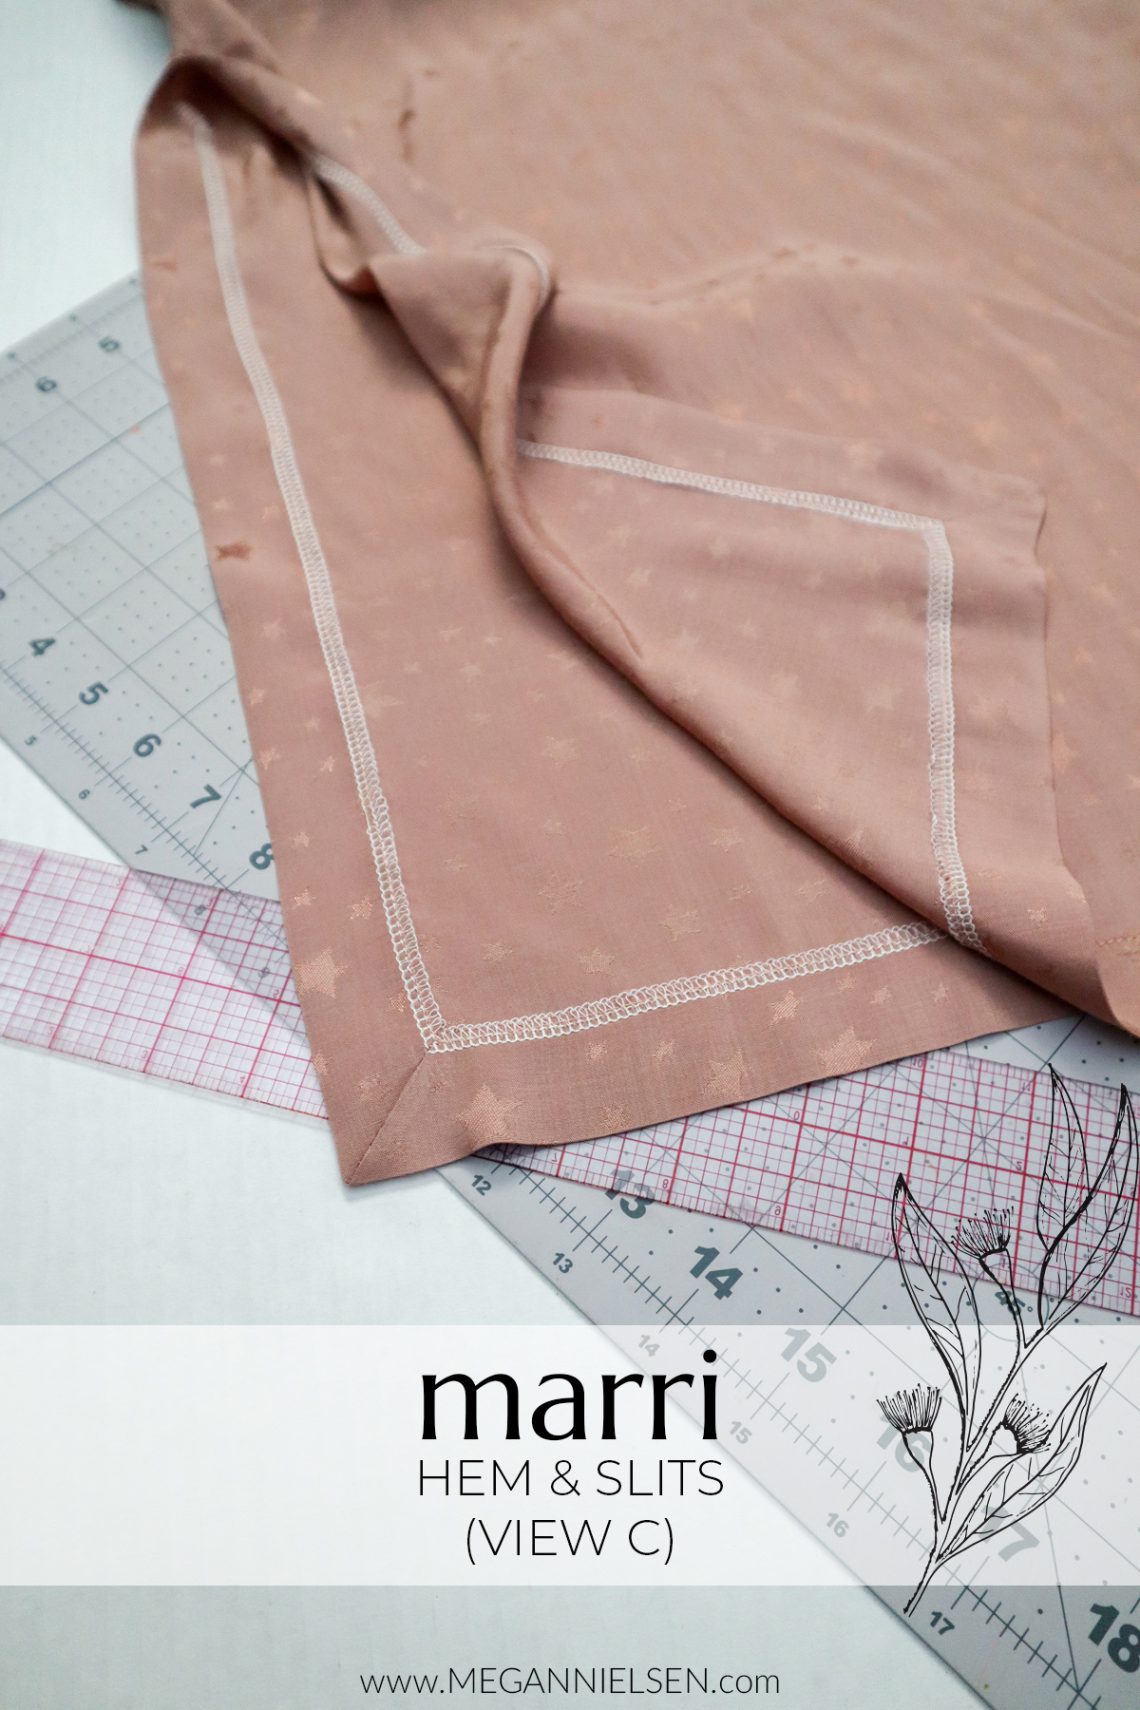

Time to finish up Marri View C! Last, but not least, is the hem. We’ll be finishing up the slits and hem in one go with some neat mitred corners.
*Because of the mix-and-match nature of this pattern, there are many different variables to go over for construction. It’s the best, organizational wise, to keep the posts grouped together for each individual view. So while I’ll be going over a straight View C here (v-neckline, thin crossover straps, long dress length with side slits), feel free to mix and match steps from this post with other steps from other posts!

Finish the raw hemline edge on both the front and the back.

Starting on one side of the front hem, turn the raw edge of the slit towards the right side of the fabric by 1 3/8″(3.5cm). Finger press, or press lightly with your iron, just at the lower edge.
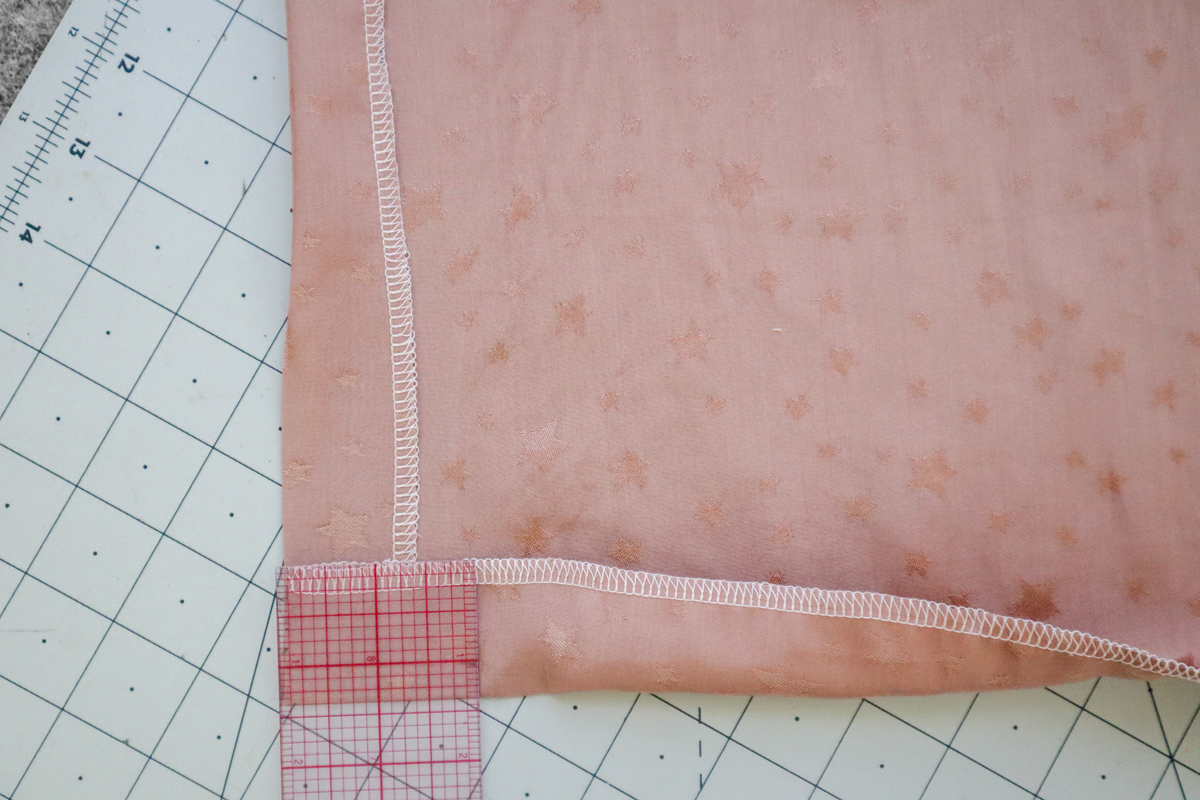
Now turn up the raw edge of the hem towards the right side of the fabric by 1 3/8″(3.5cm). Finger press, or press lightly with your iron, just near the edge.
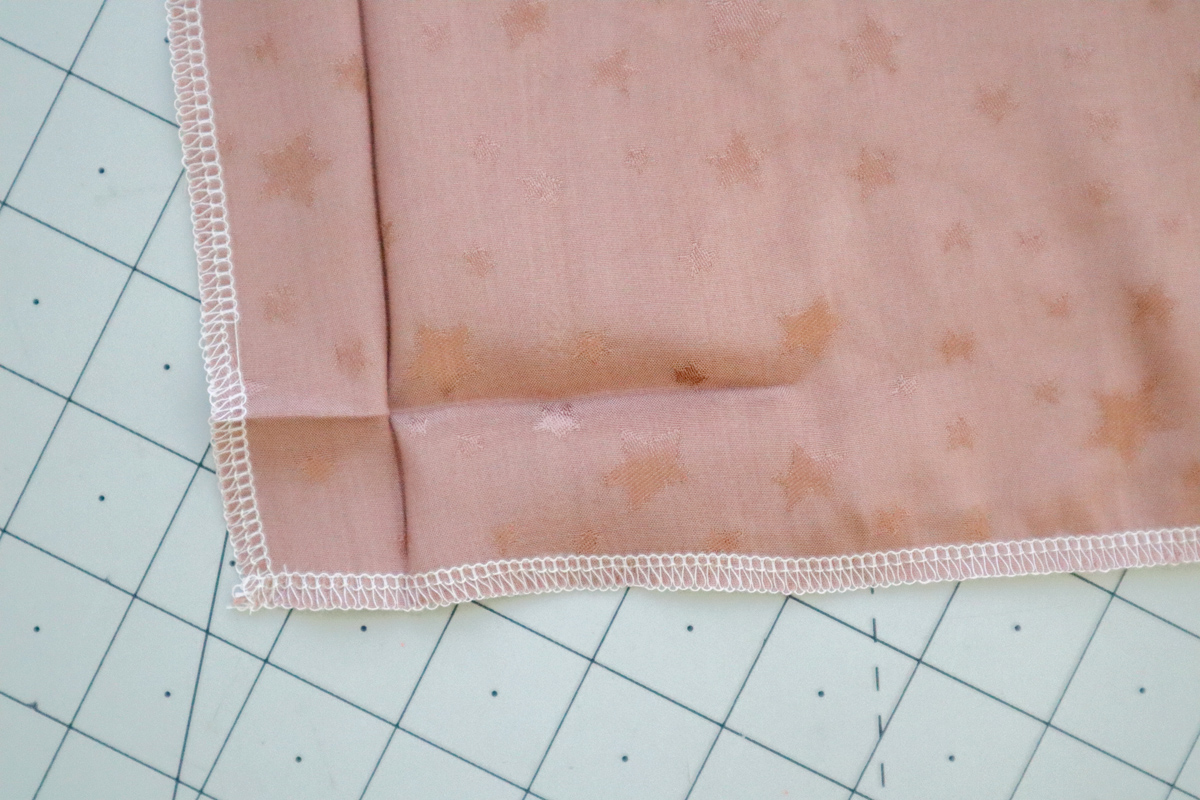
Unfold everything. You will see how pressing creates creases that will act as your guidelines.
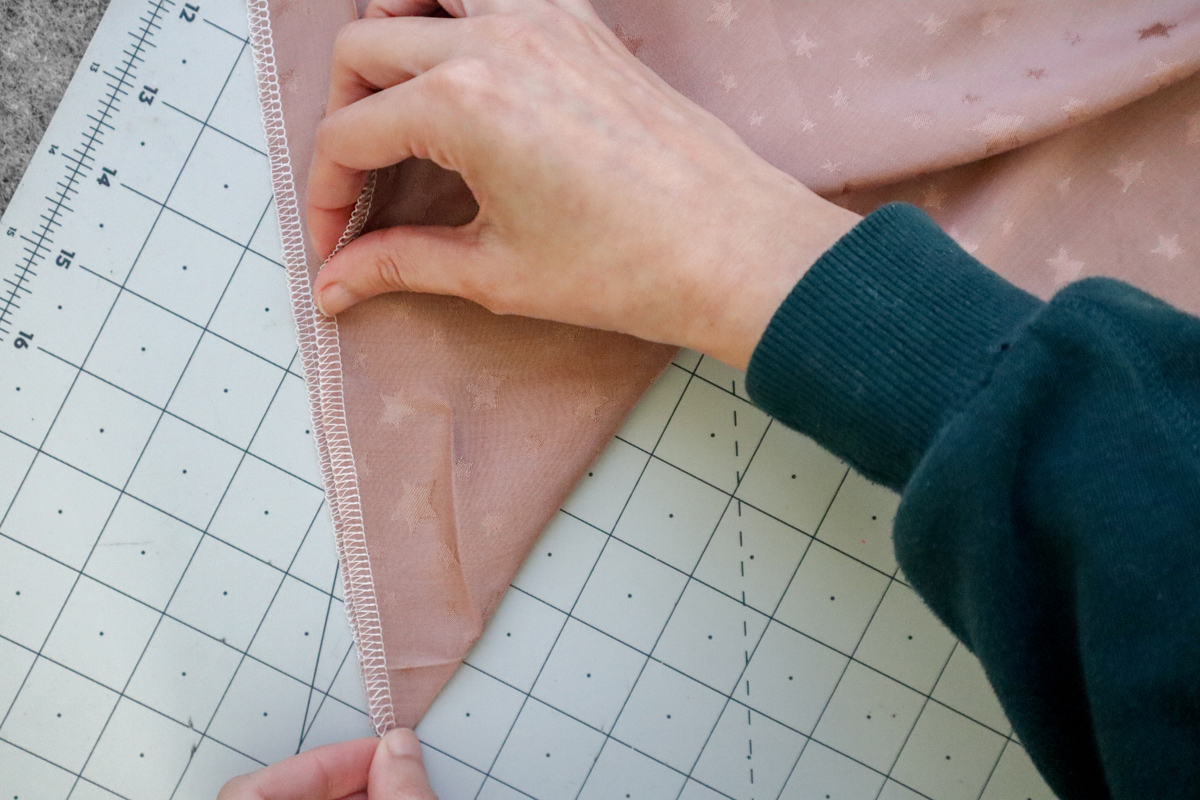
With right sides together, bring the edge of the hemline over to meet the edge of the side seam slit.
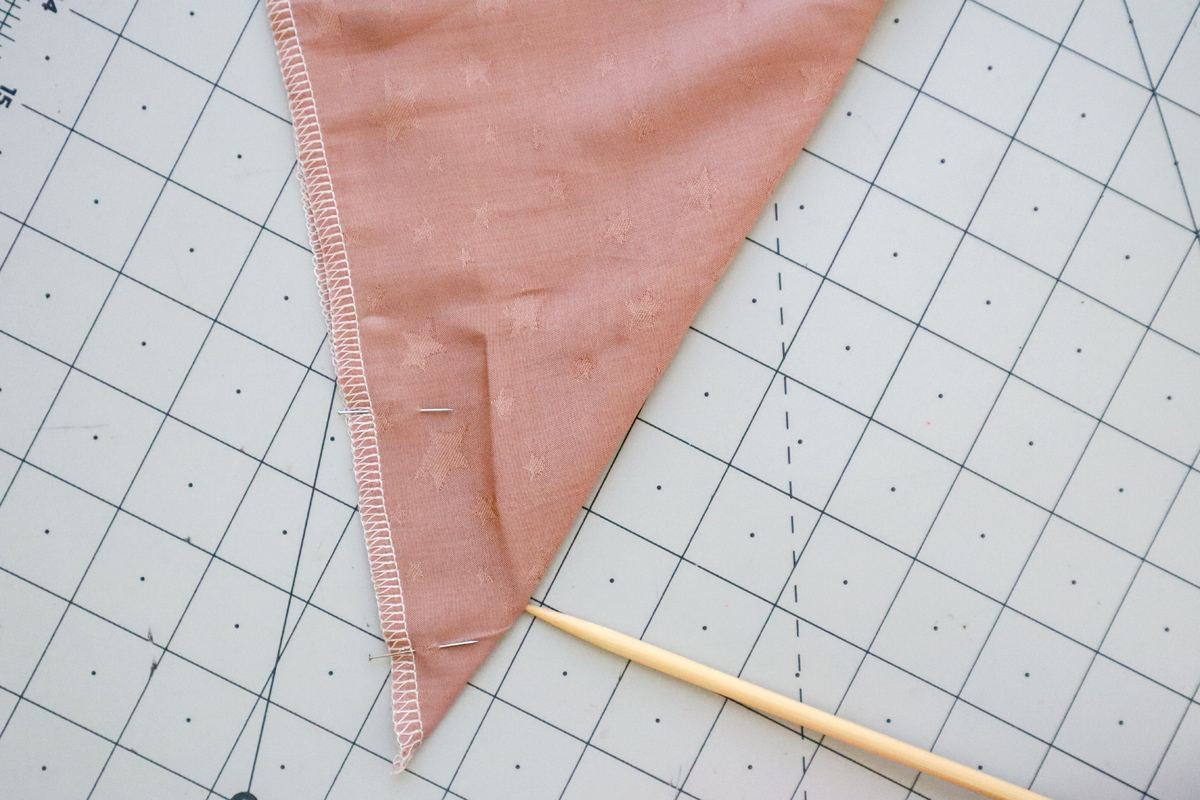
Place a few pins to hold it in place. Do you see where the two creases meet together at a point?
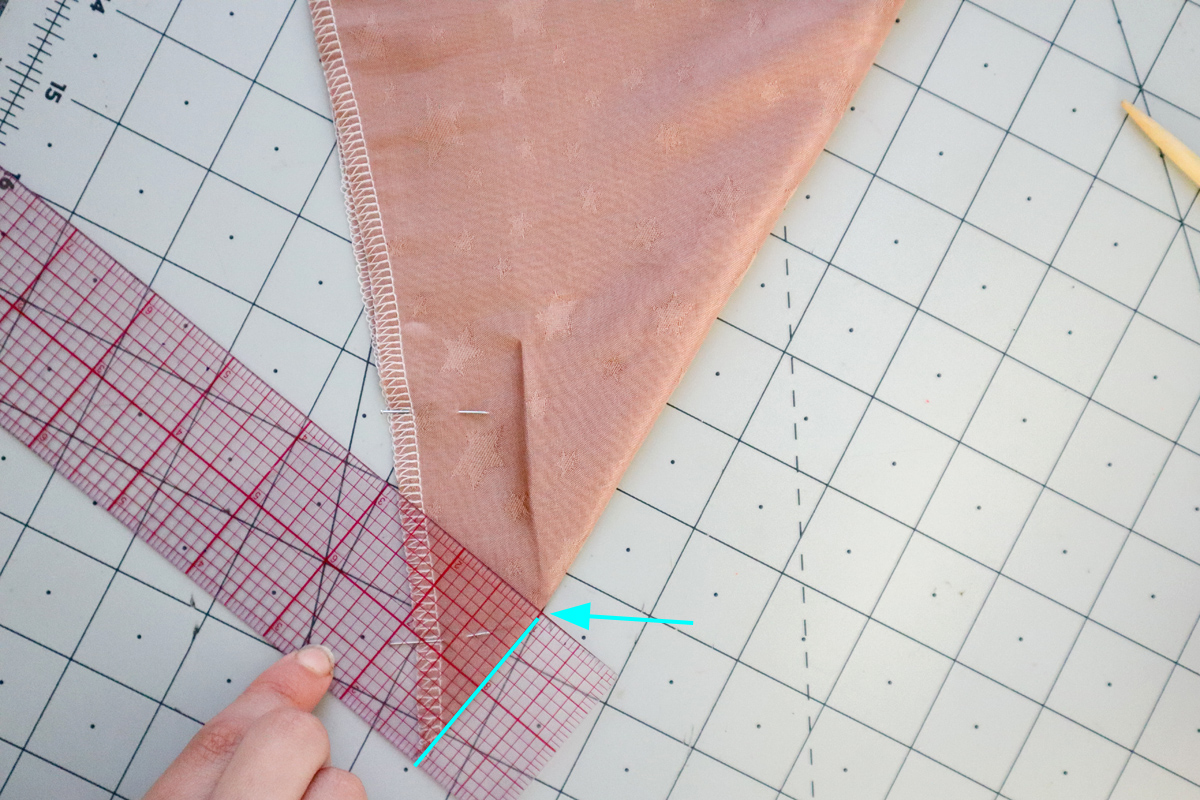
Using the folded edge as your guideline (line up the short straight edge of your ruler with the folded edge of the fabric), mark a line starting a that point where the creases meet, towards the raw edges.
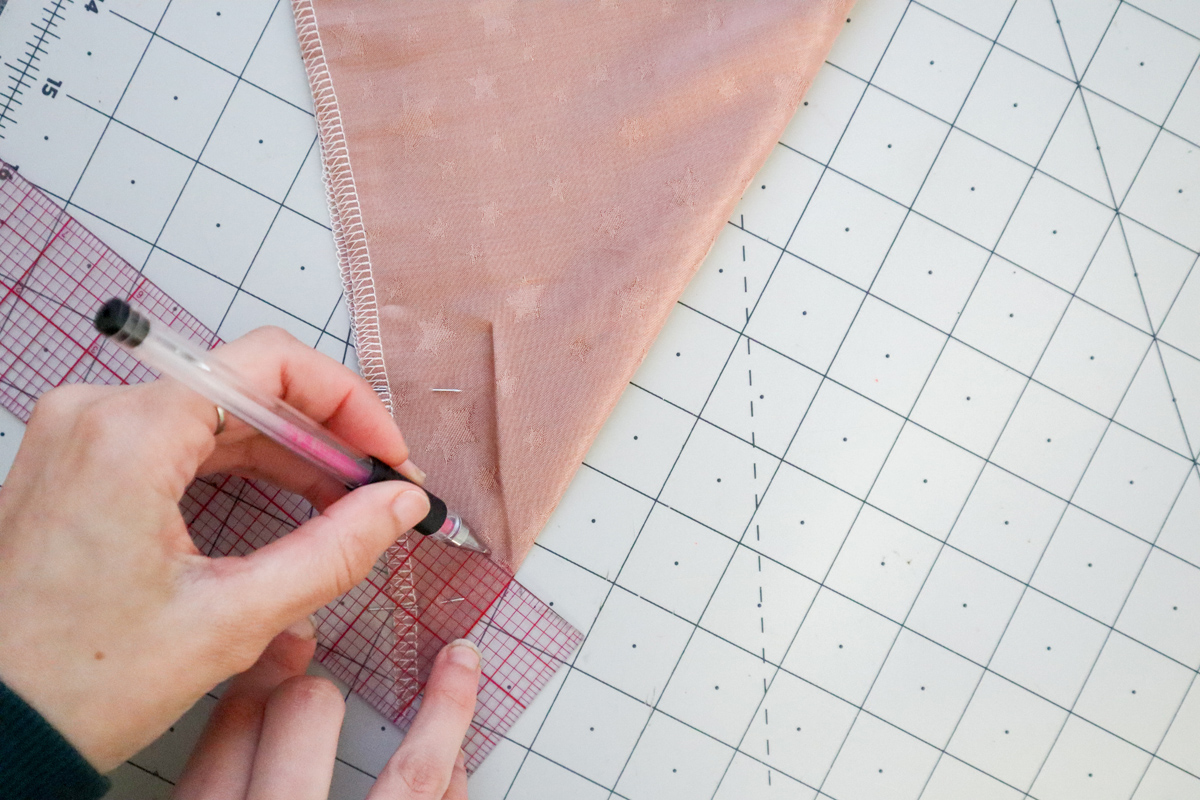
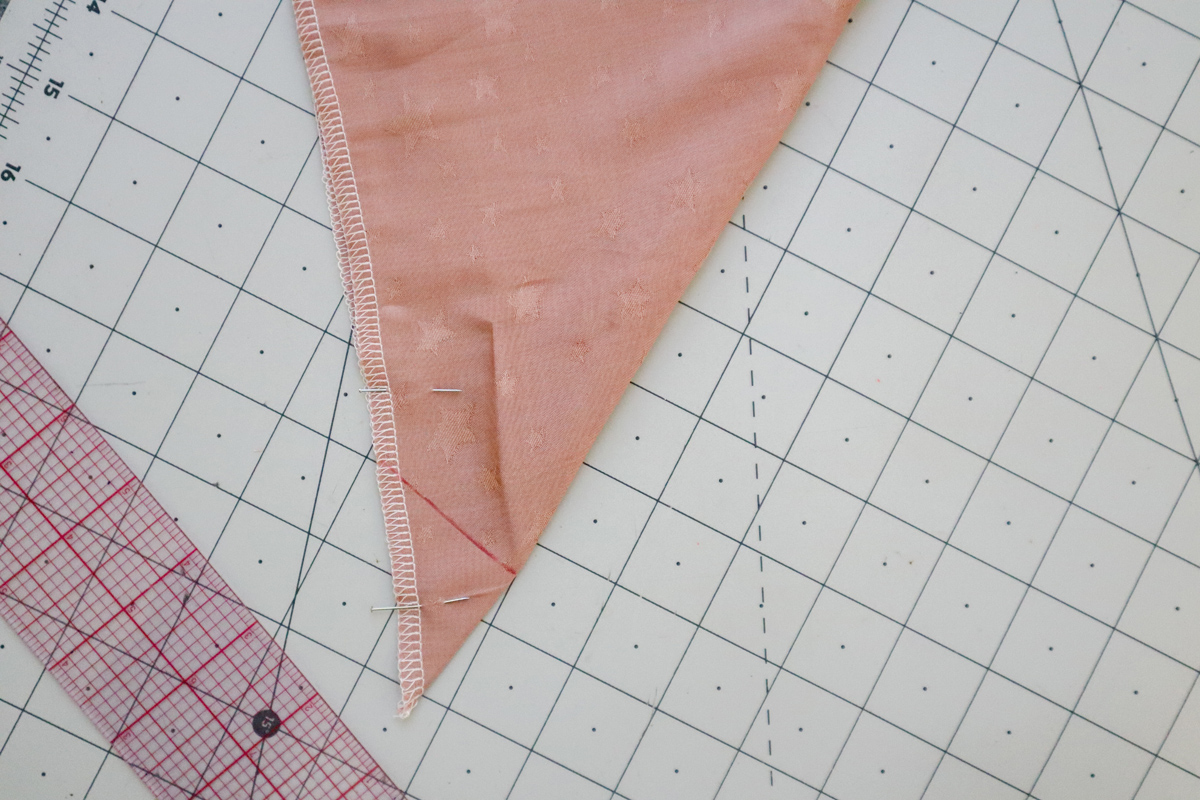
This is what it looks like. It creates a 90 degree angle with the folded edge.
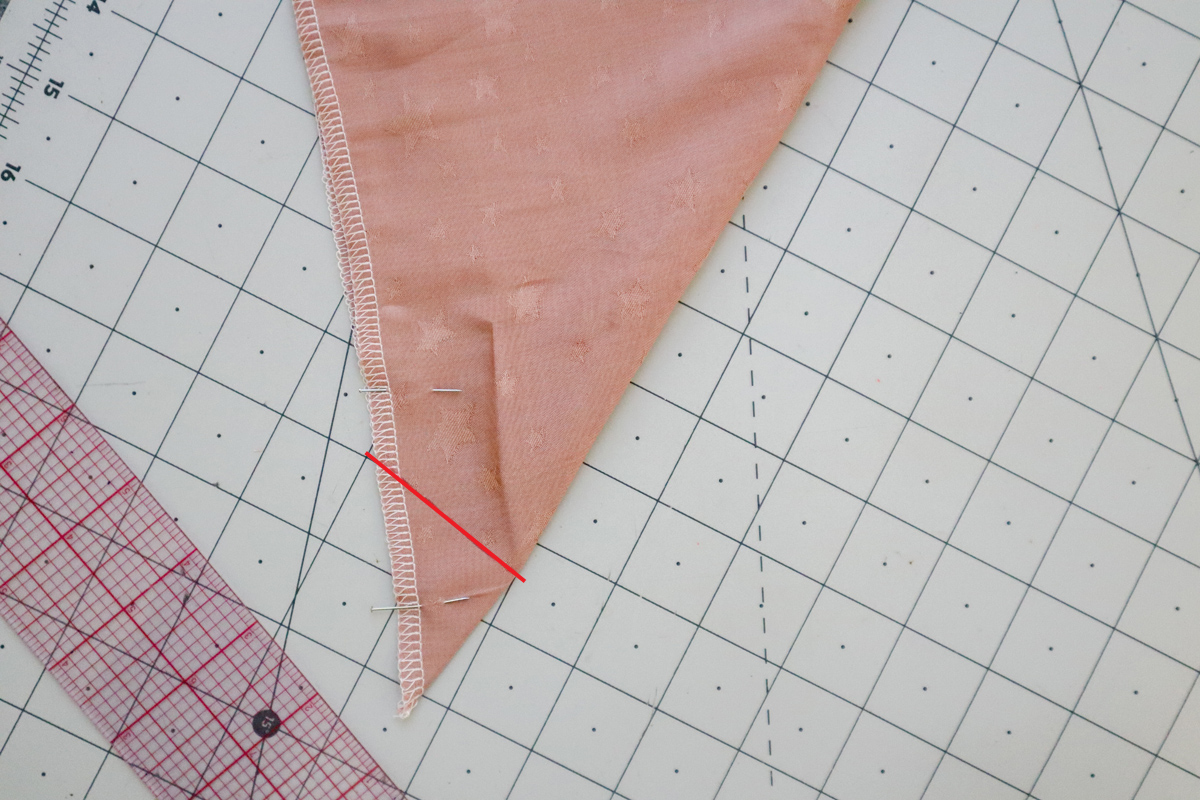
Stitch along this line.
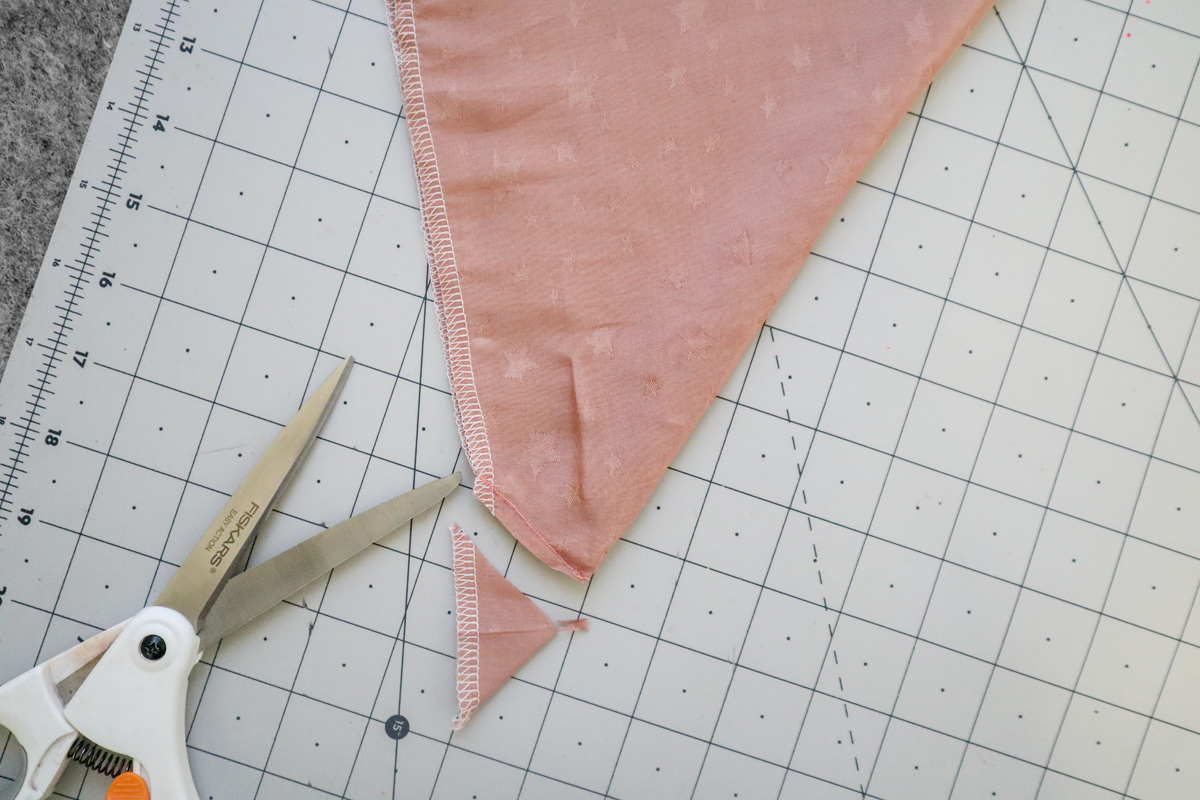
Trim off the excess fabric at the corner.
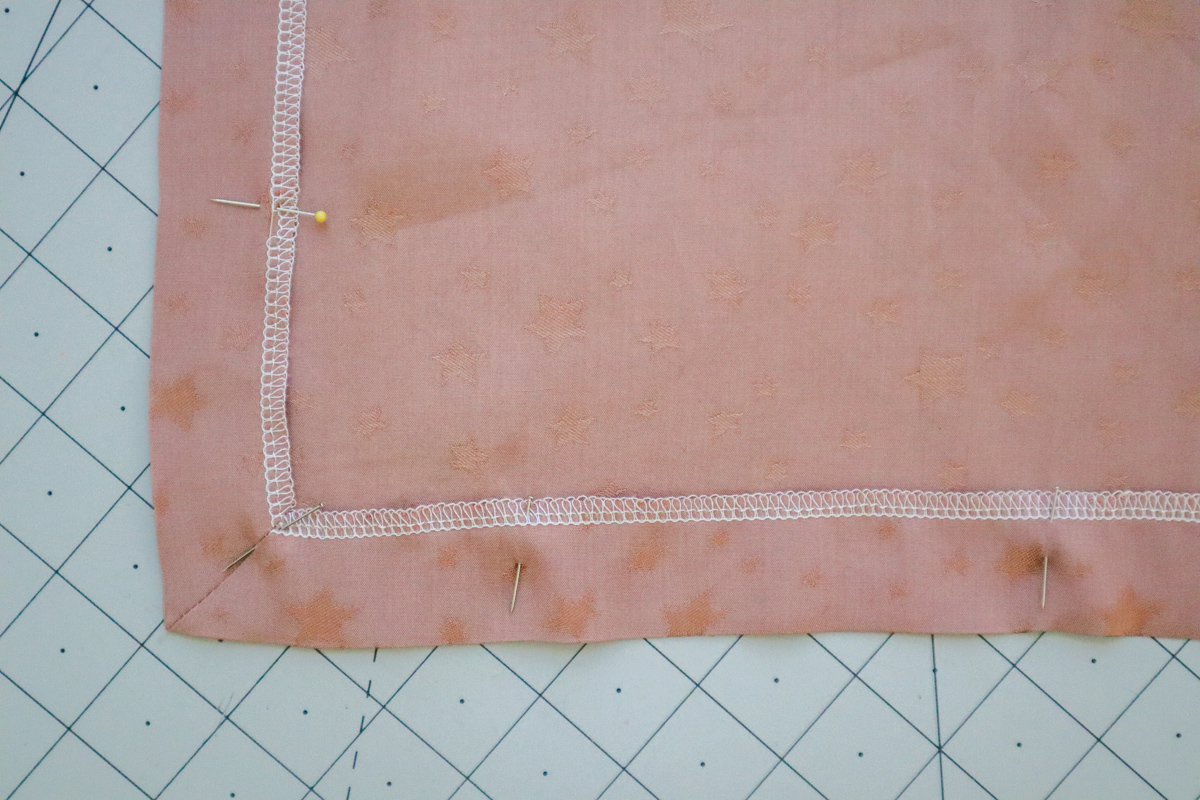
Turn the hem and slit to the wrong side of the garment by 1 3/8″(3.5cm), shaping the corner so its nice and neat.
Press well and pin in place

Repeat with the corner on the other side, as well as the other two corners on the back dress.
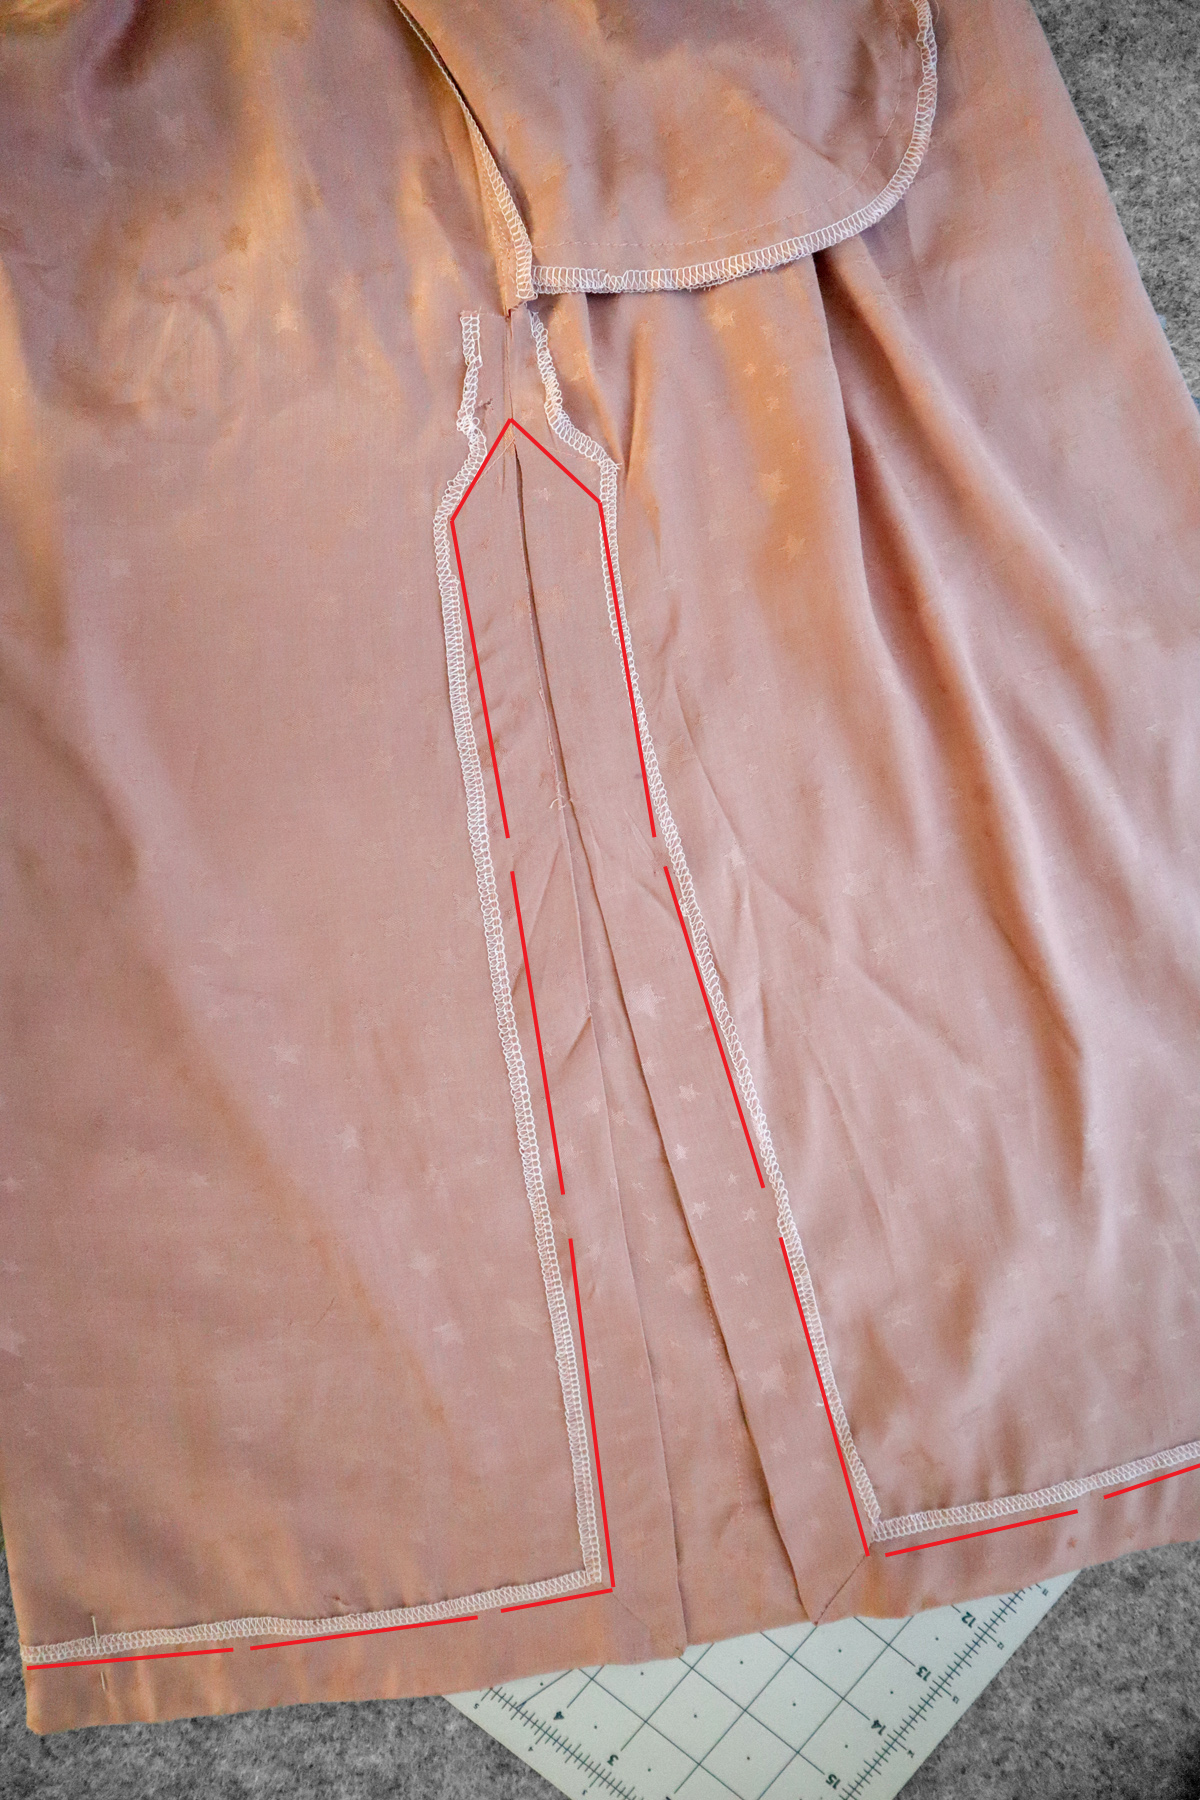
In one swoop, sew close to the raw edge along all hemline and slit openings, angling and pivoting above the slits, as shown.

Ta-da! Complete! a nice and neat hem to finish up View C.
LOOKING FOR MORE MARRI POSTS?
- How to choose between Marri & Marri Curve
- Marri Inspiration & Ideas
- Marri Sewalong : Joining pattern pieces
- Marri Sewalong : Darts & Staystitching (all views)
- Marri Sewalong : View A Straps, facings and side seams
- Marri Sewalong : View A Cami hem facing
- Marri Sewalong : View B (All steps)
- Marri Sewalong : View C Straps & facing
- Marri Sewalong : View C Pockets, side seams and finishing the straps and facing
- Marri Sewalong : View C Hem & slits (this post!)
- Marri Bonus : French seams
- Marri Hack : Colour blocked
- Marri Bonus : Fabric belt & thread chain loops
Don’t have the pattern yet?